
Designing and Building the HO Scale Howe Truss Float Bridge.
Here is a simplistic design (for operating session) Howe type float bridge.
I spent a weekend building the bulk of the structure for the Lehigh Valley section of the layout. Here are a few construction photos:
| I started off by printing the drawings I made a1 to 1 on my laser printer and laying the wood stock that I picked up from A.C. Moore. I used the blue painters tape to hold the frame together while the glue dried. Then I layered the cross members to get the desired affect. | 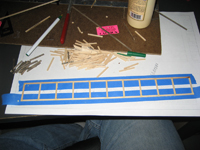 |
| With a completed truss I started construction of the substructure. I use the same method of laying out the stringers and beams on a 1 to 1 drawing and using blue tape to hold the whole thing together until the glue setup. | 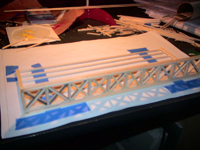 |
| Here is the progress photo of the substructure. Again I use the plans to line up and glue the parts in place. | 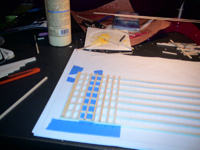 |
| Here is the completed substructure of the float bridge. The next part will be constructing two more trusses and the decking . | 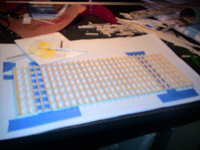 |
| Here is another completed truss section for the bridge. There are 5 layers per truss. 3 Layers are the boxed section with cross braces and 2 layers that ar just cross bracing. | 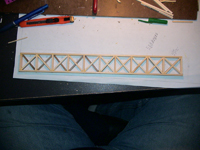 |
| Here is the bridge awaiting the decking and the third truss. The decking will be made up of plank siding that I used for the pier and solid wood of the same 1/16" thickness to build up the deck height. | 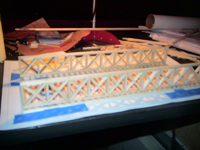 |
| Here is a shot of the bridge with most of the completed assemblies. I still need to put the ties down with the rail and then attach the trusses to the bridge. The next step is a proper staining and painting. | 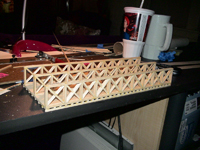 |
| Here is the just stained deck. | 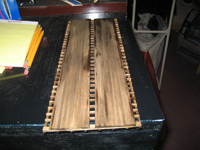 |
| Here are the stained parts to the Howe float bridge. | 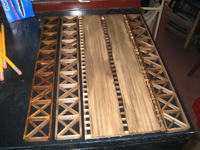 |
| Here you can see that the parts are "dry fitted" after staining. The center truss is still drying. | 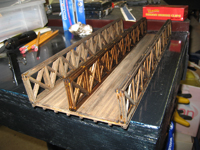 |
| Another view of the drying "dry fitted" bridge. | 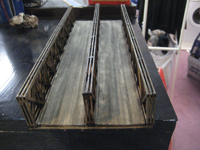 |
Page Last Updated: February 19, 2008
Webmaster: David Ramos